
Introduction
This is the official WireGuard app for Windows, not the VPN Safe Windows app. Use it when you want the upstream client, or when you already have a .conf file from the Client Area.
Installer: wireguard-installer.exe
Configs: Client Area > VPN service > city > download WireGuard config.
Install
- Download and run the official WireGuard installer.
- Open WireGuard. You will see an empty Tunnels list and an Add Tunnel button.
Import the config
- Download a
.conffrom the Client Area (example name:acc465234913-London-1-10GB.conf). - In WireGuard click Add Tunnel (or the small arrow next to it) and choose the file.
- The tunnel appears in the left list.
Connect
- Select the tunnel.
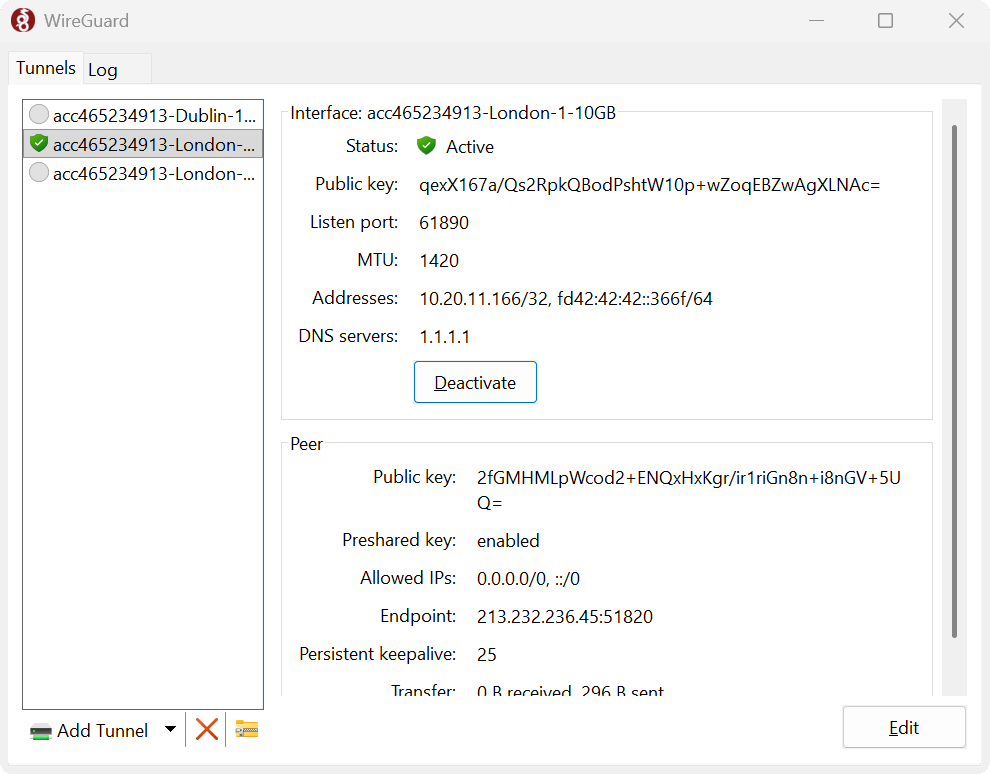
- Click Activate. Status becomes a green tick and Active.
- Click Deactivate to disconnect.
A working tunnel shows MTU 1420, DNS (often 1.1.1.1 in the file), Allowed IPs 0.0.0.0/0, ::/0, endpoint on UDP 51820, and persistent keepalive 25. Check vpnsafe.net/whats-my-ip.
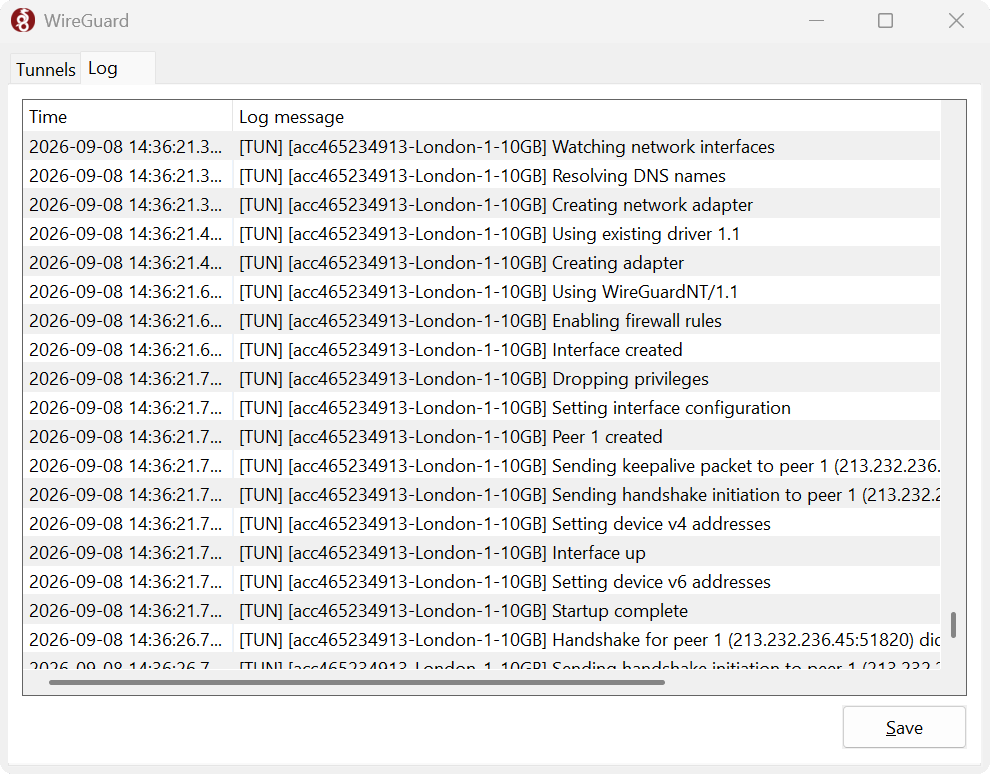
If Activate fails, open the Log tab. You want Startup complete and a handshake. Handshake timeouts usually mean UDP 51820 is blocked — try another city config, or use the VPN Safe app with OpenVPN TCP / Stealth Mode instead.
One config per device. Do not run this official client and the VPN Safe Windows app at the same time.